You can manage your ReqView projects in Git, the most popular distributed Version Control System (VCS) today. You can use the following simple Git workflow in ReqView:
- Set up a remote Git repository hosted at your premises (self-managed) or in cloud (SaaS) using GitLab, GitHub, Atlassian BitBucket and Microsoft Azure DevOps.
- Clone a remote Git repository into a local repository and check out the default branch to a local Git working tree
- Open a ReqView Project Folder from the local Git working tree
- Show Git information about the ReqView project
- Edit documents exclusively by locking ReqView document files in the Git repository
- Commit ReqView project changes to the remote Git repository
- Update the ReqView project from the Git repository to display project changes made by other users
- Browse Git history, view Git commits or compare ReqView project changes between Git commits
- Manage baselines of the ReqView project using Git tags
This workflow allows more editors to edit different documents at the same time. For instance, one editor can edit a system requirements specification document while another editor is editing a system verification document.
To enable the integration with Git, click Edit, select Preferences, and tick Integrate with Git.
Git Setup
Install Git Client
Download and install Git command line tools for your platform before using Git integration in ReqView.
- Windows: Run WinGet command
winget install --id Git.Git -e --source winget. - Linux: Run apt-get command
sudo apt-get install giton Ubuntu or Debian Linux. - Mac: Git is installed with XCode automatically. If XCode is not installed yet, use command
xcode-select --install.
You can verify if the installation was successful by the following command:
$ git --versionIf git command is not found, make sure that it is present in the system or the user environment variable PATH.
Before you start to use Git first time, you have to set your identity, username and email, see Your Identity in First-Time Git Setup. If you use some Git GUI tool, it would ask you to do this when you first run them. If you are not sure if your identity is set, run
$ git config --list --show-originand look for user.name and user.email in the output.
Connect to Git Repository
Before you can follow the Git workflow for a ReqView project, your Git administrator must set up a remote Git repository and import the project into the repository as described in Git Administration.
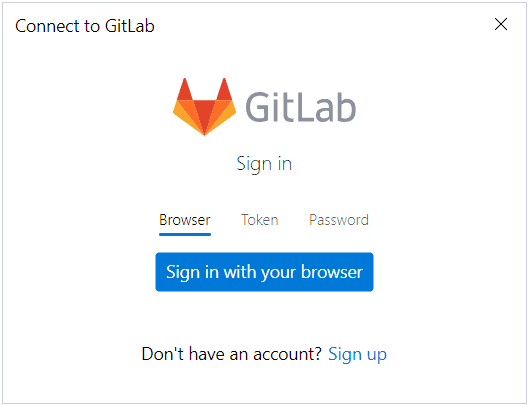
When you connect to the repository for the first time, you need to enter and save login credentials because ReqView does not store any passwords. We recommend using the Git Credential Manager (GCM) developed primarily by GitHub, Inc. The GCM provides secure authentication experience and supports multi-factor authentication via the HTTPS protocol for GitLab, GitHub, Bitbucket, Azure DevOps and others out of the box. For example, the GCM opens the following authentication window when connecting to a Git repository hosted at GitLab.com:
On Windows, the GCM is installed with Git. On Linux and Mac, follow GCM Install Instructions to install it manually. To verify that the GCM is installed, run git credential-manager -h and check that the command shows help. To verify that the GCM is configured properly, run git config --get-all credential.helper and check that the command only prints the string “manager”.
You can also use any other Git credential helper to avoid entering password for each git command. Or, use Git with the SSH protocol – configure SSH public key authentication (without a password) or set up an SSH authentication agent to cache your SSH keys (such as ssh-agent, or Pageant).
For more information, check the documentation of your Git provider:
- Git Server: Git on the Server
- GitLab: Two-factor authentication, and Use SSH keys to communicate with GitLab
- GitHub: Caching your GitHub credentials in Git and Connecting to GitHub with SSH
- Bitbucket: Configure SSH and two-step verification
- Azure DevOps: Use Git Credential Manager to authenticate to Azure Repos, Use SSH key authentication
Clone Git Repository
You can clone a remote Git repository that stores a project using ReqView or the git clone command. ReqView uses the default branch usually named master or main.
To clone a Git repository, open ReqView, click File, select Git and then Clone Repository. In the Clone Git Repository dialog enter the URL of the remote Git repository, choose an empty folder for the working tree, and press OK.
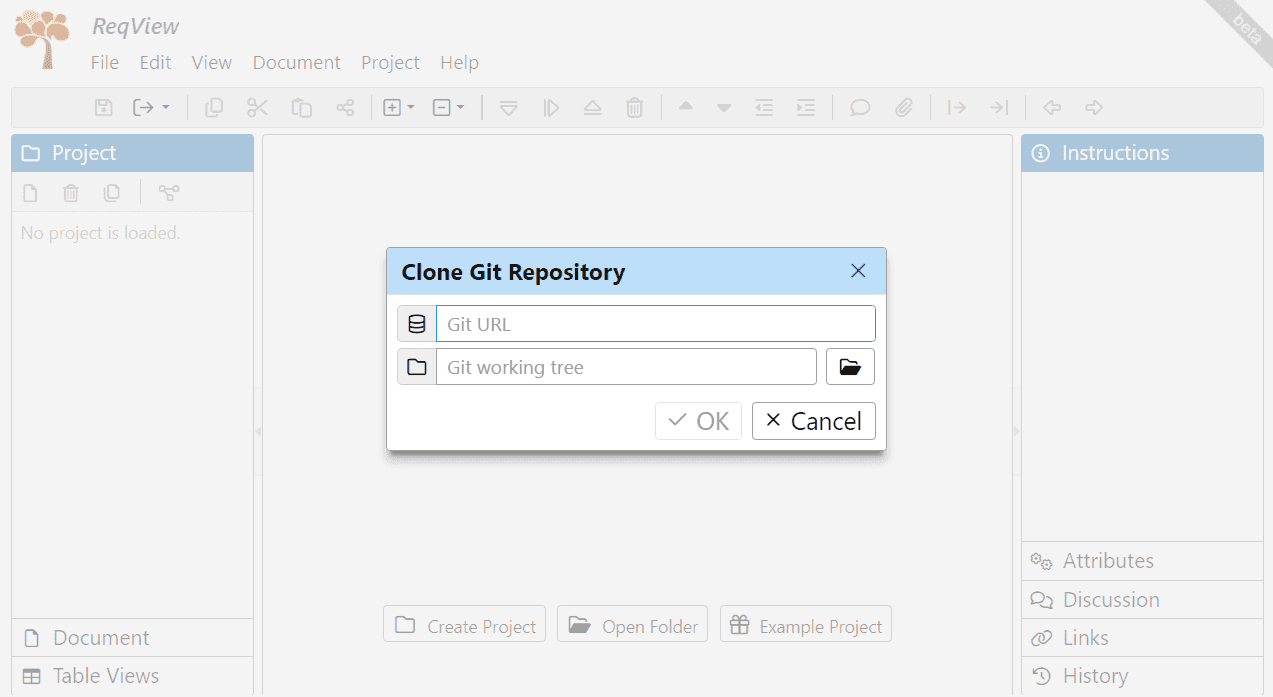
If the remote repository is empty, ReqView offers to create a new project. The new project is saved to the chosen folder, committed and pushed to the remote repository.
To check out the project using the command line, switch to the parent folder of the working tree, and run:
$ mkdir <reqview_project>$ git clone <git_repository> <reqview_project>Create Local Workspace
If you need to work with linked projects, you should create a local workspace with a predefined hierarchy of project folders. You can create the local workspace easily by just running a script prepared by your administrator, see Git Administration > Create Workspace.
Git Edit Workflow
Open Projects
To open the Project Folder in ReqView, click File, then Open Folder, and select the folder from the Git working tree. The application displays icon in the top right corner of the screen to indicate that the project is managed in a VCS.
Edit Projects
To open a document, click on the document in the Project pane. The application displays icon in the top right corner of the screen to indicate that the document is read-only.
To edit the document exclusively, click Document and select Start Editing Document, or press CtrlShiftE, or click . The edited document is locked in the remote Git repository automatically to prevent merge conflicts with other users.
Note: ReqView locks files in Git using an internal Git mechanism, which is ignored by other Git clients. To avoid merge conflicts, do not edit ReqView projects using other tools and ReqView at the same time.
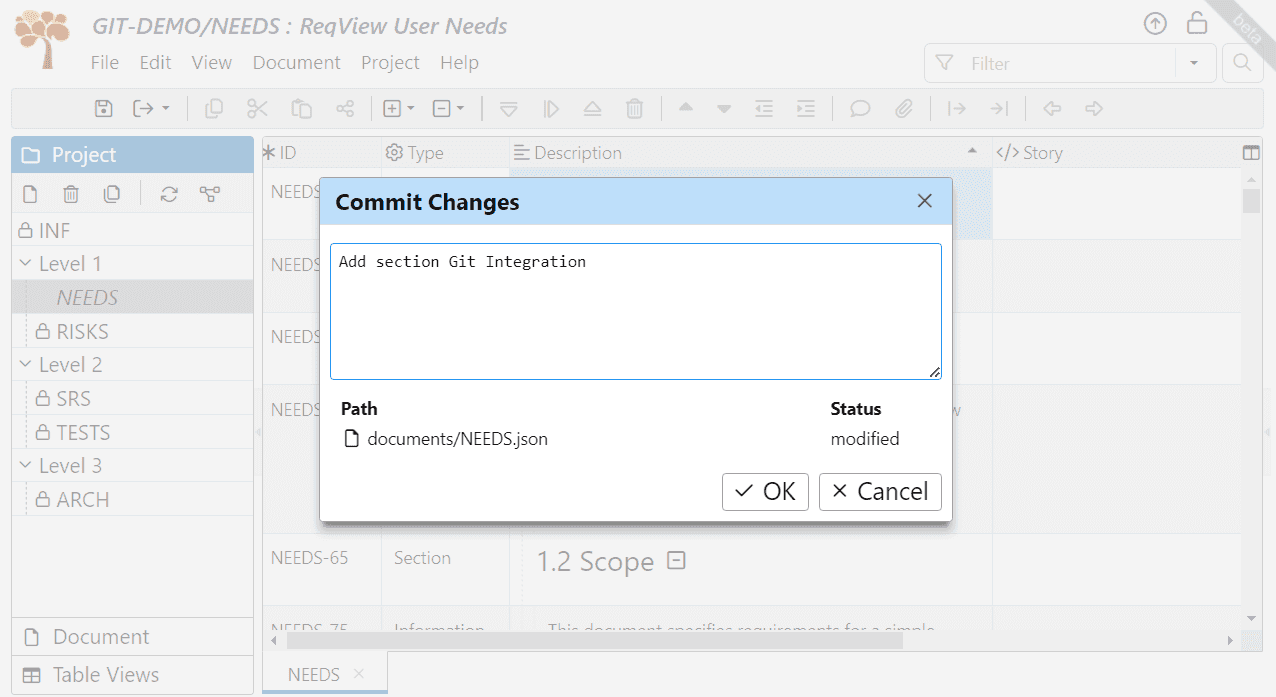
To commit and push intermediate changes to the remote Git repository during editing, click File, select Git, and then Commit, or click . In the Commit Changes dialog, enter a commit message and press OK:
To finish editing the document, click Document and select Finish Editing Document, or press CtrlShiftE, or click . If the document has local changes, enter a commit message in the Commit Changes dialog. The edited document is unlocked in the Git repository automatically to allow other users to edit. All edited documents are also unlocked in the Git repository when the project is closed or saved as another Project File or Project Folder.
Note: Project changes are committed to the Git repository automatically when you add or remove a document, change project traceability, group documents, or import or export ReqIF.
To revert all local changes to the latest version in the Git repository, click File, select Git, then Revert, and finally press OK in the Revert Changes dialog.
Update Projects
To update the current project with changes from the Git repository, click Project and select Refresh Project, or press CtrlR, or click in the Project pane.
To update the current project including all loaded linked projects with changes from the Git repository, click Project, select Linked Projects and then Refresh All Projects, or press CtrlShiftR, or click in the Linked Projects pane.
To enable updating projects opened from a folder on application startup automatically, click Edit, select Preferences, and check Refresh project on startup and open.
Show Git Information
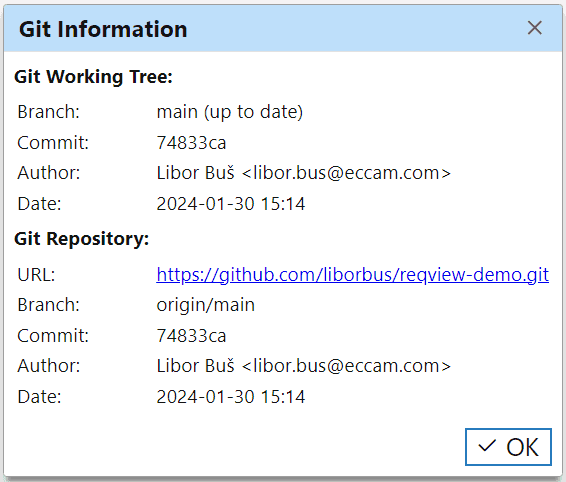
To display information about the Git working tree and the last version stored in the Git repository, click File select Git and then Information:
Git History
Git repository stores the read-only history of all project files changed in each commit.
Browse History
You can browse the Git commit history to see who, when and how changed the project in the past. To display the Git history in the Git History dialog, click File, mouseover Git and then select History.
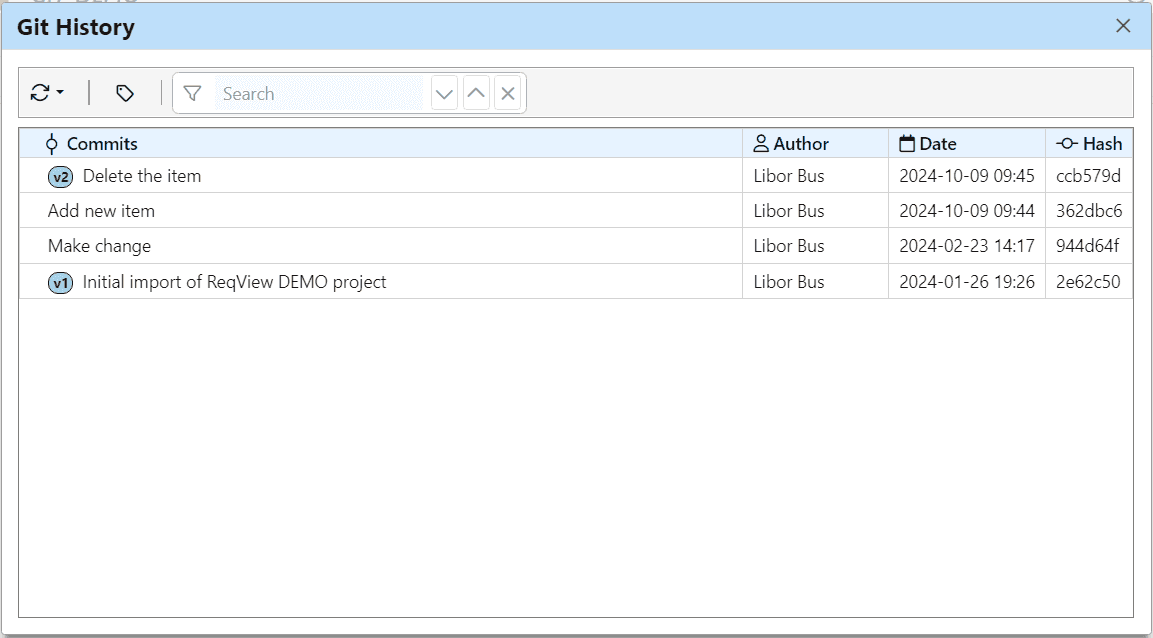
The dialog shows a table of Git commits sorted by time. For each commit it displays the commit message, the name of its author, the date, and the Git hash. To refresh the Git history, click the button and select Refresh History.
Open Commits
To open the project version stored in a Git commit, click button or right-click the commit and select Open in New Window.
Search Commits
To search a specific keyword in any of the displayed columns of the Git History dialog, click the Search input field in the toolbar and enter a searched keyword. The dialog then highlights all found occurrences of the searched keyword in the table. To navigate to the next or previous highlighted Git commit, click the or button respectively. To cancel search, click the button in the search input field.
To filter the table and display only Git commits containing the searched keyword, click the icon in the Search input field.
Compare Commits
You can compare two Git commits selected in the Git History dialog and see project changes in the Compare Project dialog open in a new application window:
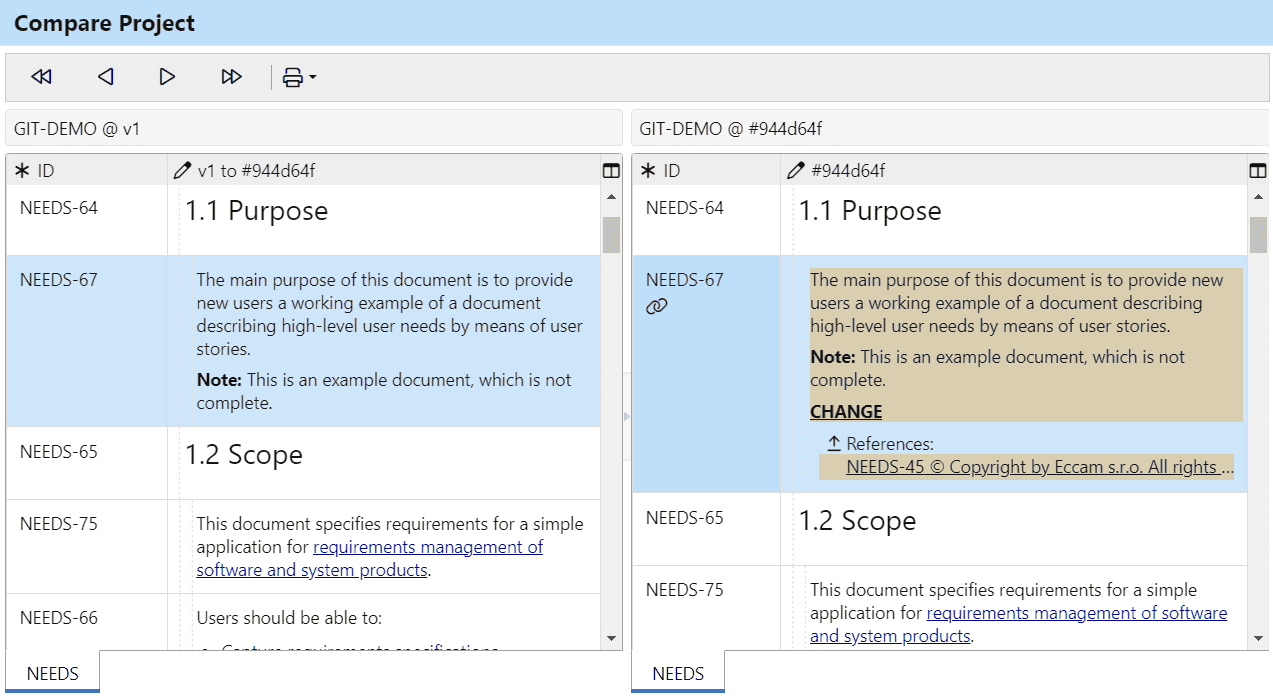
To view project changes made at a Git commit, click button or right-click the selected commit, mouseover Compare With, and select Previous Version.
To compare a Git commit with the current project version, click button or right-click the selected commit, mouseover Compare With, and select Current Version.
To compare two Git commits, first click button or right-click the first commit, select Set for Comparison. The first commit is marked by the icon. Then, click button or right-click the second commit, mouseover Compare With, and select Version with the Git hash of the first commit.
Digitally Sign Commits
The administrator can configure your Git repository to enable digital signature for Git commits. A digital signature added to a commit verifies the identity of the commit author and that the ReqView project data changed by the commit has not been tampered with. For more information see Git Administration > Digitally Sign Git Commits.
Git Baselines
You can manage ReqView project baselines using Git tags. Each Git tag has a unique name and is assigned to a Git commit, storing a read-only version of the project.
You can use the Git History dialog to display and manage Git tags, see Browse History. The dialog displays Git tag names for tagged commits in the Commits column. To show detailed information about a Git tag, click button or right-click the tagged commit, mouseover the tag in the popup menu, and select Show Details.
To enable and disable filtered display of only tagged commits in the dialog, click the button in the toolbar.
Manage Baselines
To create a Git tag for the project version stored in a Git commit, click button or right-click the selected commit and select Create Tag. In the Create Tag dialog enter a tag name which is unique in the Git repository storing the project. The Git tag is pushed to the global repository automatically.
To delete a Git tag, click button or right-click the tagged commit, mouseover the tag in the popup menu, and then select Delete Tag.
Open Baselines
To open the project for a Git tag as read-only, click button or right-click the commit and select Open in New Window.
Compare With Baselines
To compare the current project version with a Git tag, click button or right-click the selected commit, mouseover Compare With, and select Current Version.
To compare two Git tags, first click button or right-click the first tag, select Set for Comparison. The first commit is marked by the icon. Then, click button or right-click the second tag, mouseover Compare With, and select Version with the name of the first tag.
Git Troubleshooting
-
Clean Working Tree: If a Git action is canceled manually, the Git working tree may be left with locked index and may need to be cleaned up. To clean up the Git working tree, click File, mouseover Git, select Cleanup and then refresh the project.
-
Release Git Locks: A system administrator can release project or document locks when another editing user cannot release the lock from ReqView application, for instance if his computer is broken or if he leaves the company with a document locked for editing. For more information, see Git Administration > Force Release of Git Locks.
-
Git error fatal: detected dubious ownership in repository can occur when some files or directories inside the Git working tree are owned by other users than the logged in one. First, make sure the project folder is not on a shared drive. If so, move or copy the folder to the local drive and open it in ReqView. Otherwise, see Fix that damn Git Unsafe Repository.