Requirements Interchange Format (ReqIF) is an open industry standard for exchanging requirements between organizations using different requirements management (RM) tools.
The main advantage of ReqIF compared to CSV format is that it supports synchronization of complete requirements specifications including requirements hierarchy, attributes, attachments, rich text formatting and traceability without any information loss.
You can use ReqIF to collaborate with your customers that use another RM tool during requirements clarification process. Or collaborate with team members using a Model-based Systems Engineering (MBSE) tool while maintaining traceability between requirements and design elements. For more information about ReqIF use cases see How to Exchange Requirements Between Tools via ReqIF blog post.
Summary of ReqIF features:
- Preserve rich text formatting
- Preview image attachments
- Open file attachments
- Browse links by clicking
- Set page layout for print
- Import changes
Note: The features above depends on the tool, in which ReqIF files are open or imported. ReqView supports all these features.
Export ReqIF Files
To export a ReqIF file, click File, mouseover Export, and click ReqIF Package. In the Export ReqIF dialog, choose documents to export and other options. After confirmation of the dialog, select a destination for storing the exported ReqIF file (.reqifz).
The exported ReqIF package (ReqIF version 1.2) will store the following information from the current ReqView project:
-
Documents: ReqView documents are exported as ReqIF specifications.
- ReqView document ID is stored in the
ReqIF.ForeignIDstring attribute. - ReqView document name is stored in the
ReqIF.Descriptionstring attribute. - Tree hierarchy of ReqView document sections is preserved.
- ReqView document ID is stored in the
-
Document Objects: ReqView document objects are exported as ReqIF spec objects with the type matching the original document.
- ReqView object IDs are stored in the
ReqIF.ForeignIDstring attribute. - ReqView system attributes heading and text are stored in
ReqIF.ChapterNamestring attribute andReqIF.TextXHTML attribute (or the original ReqIF attributes if the objects were imported). - ReqView custom attributes are defined in the ReqIF spec object type. All custom attribute values are exported.
- Rich text format of
xhtmlcustom attributes is preserved. - ReqView document objects marked as deleted are not exported.
- ReqView object IDs are stored in the
-
Attachments: ReqView attachments are stored as separate files in the compressed .reqifz package. They are referenced from
<object>tags stored inReqIF.TextXHTML attributes. -
Traceability Links: ReqView traceability links are exported as ReqIF specification relations between the corresponding spec objects.
Export Options
Documents:
- Current document – export the current document only
- Open documents – export all open documents from the main project
- All documents from the main project – export all documents from the main project
Options:
- Export each document separately – export the selected documents (specifications) to separate .reqifz files. Useful for bulk round-trip exports for different recipients. Note that links between documents will not be exported when checked.
- Export for DOORS Next – if enabled:
- Conflicting attribute names in different ReqView documents (e.g. “Status”) will be disambiguated by adding document IDs (e.g. “Status (NEEDS)” and “Status (SRS)”) to prevent IBM DOORS Next from adding a “ [DNG-Renamed-#]” suffix.
- RDF URIs defined by DOORS Next will be exported for system attributes and datatypes. See Defining URIs for more information.
Note: URIs defined by previous ReqIF imports are always exported.
- Export for Capella MBSE – if enabled, numeric ReqIF.ForeignID attribute values like “123” will be used in objects instead of e.g. “SRS-123”, and a .properties file with custom attribute names will be included in the export. See Export ReqIF to Capella & Other MBSE Tools below.
View Exported ReqIF Files
You can view exported ReqIF files in another ReqView project window to verify its content. Click Project, select Create Project. In the Create Project dialog choose From ReqIF, and enter an ID of the new project, and press OK. For more information how to import ReqIF files to ReqView see Import Requirements From ReqIF.
You can also view exported files in a free ReqIF viewer, such as ProR or ReqIF Studio.
ProR is an open-source tool that natively supports the ReqIF standard and supports very basic functionality for viewing and editing textual requirements. It is available for free as part of the Eclipse Requirements Modelling Framework (RMF). The last RMF version 0.11 was released in 2014, and the project is not further maintained.
ReqIF Studio is a free tool based on the Eclipse RMF with a few extensions. The last ReqIF Studio version 2.4.1 was released in 2018. You can download it from ReqIF.academy after a registration.
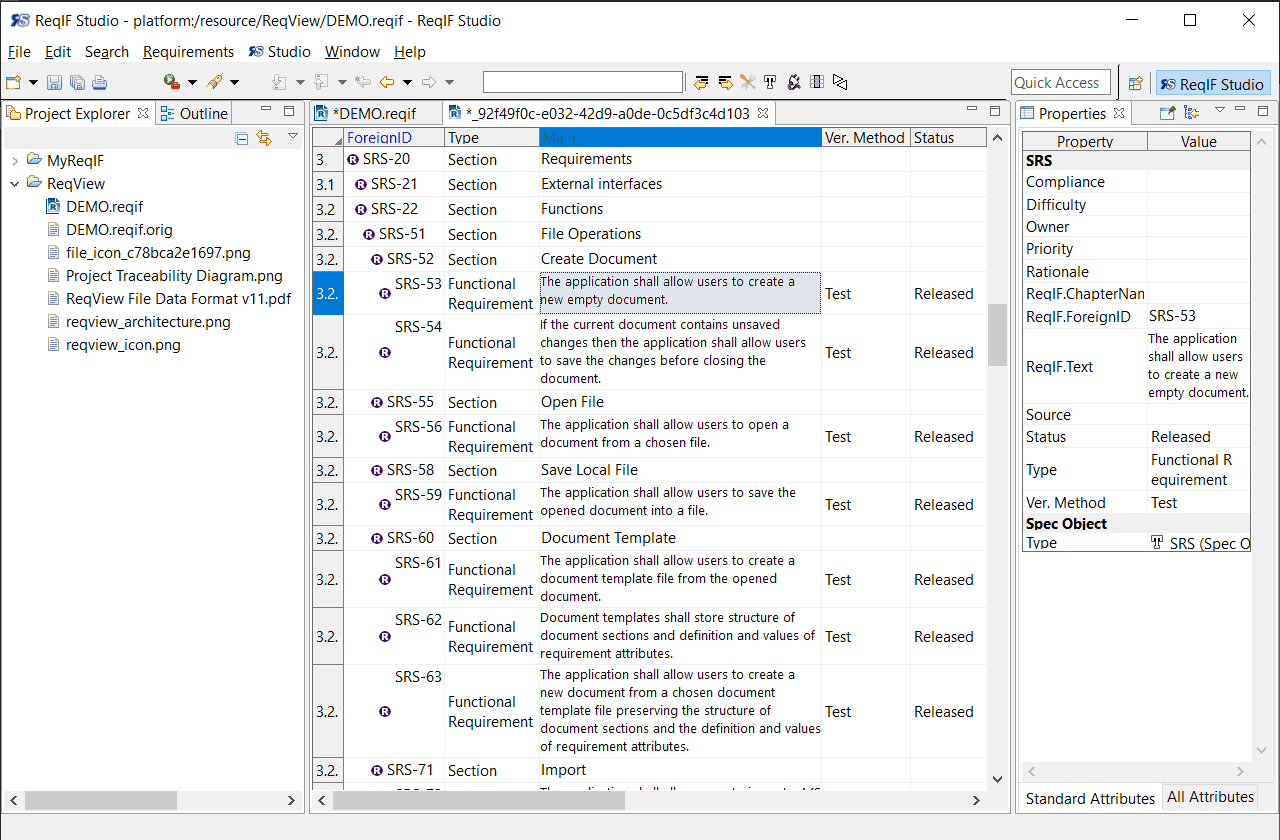
How to view a ReqIF file exported from ReqView in the ReqIF Studio:
- Click File > Import menu and select ReqIFz Import Wizard in the ReqIF Studio.
- In the ReqIFz Import dialog, select a .reqifz file exported from ReqView and an existing target project. Alternatively, enter a name to create a new project. Click Finish to import the selected ReqIF file.
- Expand the target project in the Project Explorer pane and double click on the .reqif package to open it.
- In the Specifications section, double click on an imported ReqIF specification to see its content in a separate tab.
Example: Display the SRS (Software Requirements Specification) document imported from the ReqView Demo project in ReqIF Studio.
Export ReqIF to Capella & Other MBSE Tools
You can export requirements from ReqView to a Model-Based System Engineering (MBSE) tool to maintain traceability between requirements and design elements.
Capella is an open-source tool supporting the popular Arcadia MBSE method. It was originally developed by Thales and is available as part of the Eclipse PolarSys project now. The Arcadia method is inspired by the SysML language, see Equivalences And Differences Between SysML and Arcadia/Capella.
Follow these steps to import a ReqIF file from ReqView into Capella:
- In ReqView, export a ReqIF package as described above. In the Export ReqIF dialog check Export for Capella MBSE. Then, unzip the exported .reqifz file to a folder.
- In Capella, install the Requirements Viewpoint add-on and reference it from your existing project:
- Click Window, mouseover Show View, and select Kitalpha > Viewpoint Manager to display Viewpoint Manager pane.
- Select a model element in the Project Explorer pane, right-click Capella Requirements, and select Reference from the context menu.
- Configure import of Capella custom attributes:
- Click Window, click Preferences, and select Capella > Requirements > Importer in the preference tree on the left.
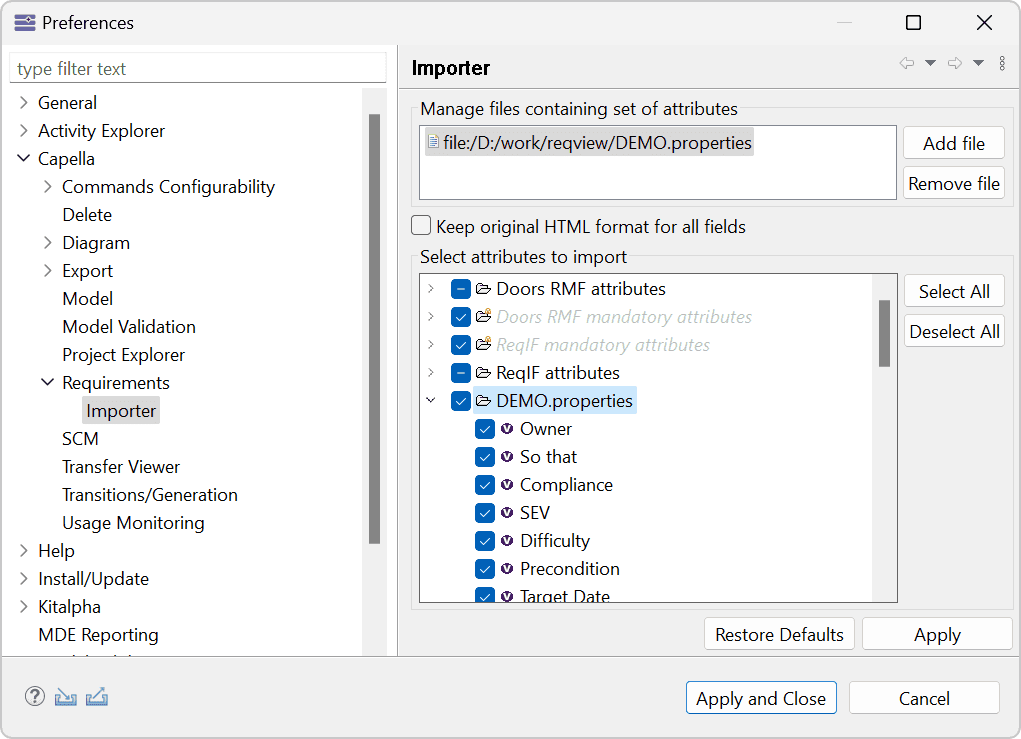
- Click Add file and Browse File System. In the Open dialog, select the unzipped .properties file created in Step 1:
![Enable import of custom attributes in Capella Enable import of custom attributes in Capella]()
- Click Apply and Close.
- Right-click a selected architecture element in the Project Explorer pane, mouseover Requirements Viewpoint in the context menu, click Import from ReqIF. In the Open dialog, select the unzipped .reqif file created in Step 1.
- If the imported file references images, the Image importing parameters dialog will appear. Click Browse to choose a folder located inside the workspace to which the images will be copied, e.g. In-Flight Entertainment System/images/. Finally, click OK.
- Review and apply changes in the Model Update dialog. In the Synthesis pane, right-click selected imported elements, select Apply change(s) and confirm Merge Options. Finally, click OK.
- If images were imported, right-click on the images folder selected in step 6 in the Project Explorer pane and click Refresh.
- Configure display of imported custom attributes:
- Click on (View Menu) at the top right of the Project Explorer pane and click Filters and Customization.
- Uncheck Requirement VP Attributes to make them visible in the Project Explorer pane.
- Configure display of requirements in diagrams:
- Right-click a selected System Engineering element in the Project Explorer pane, mouseover Requirements Viewpoint in the context menu, click Configure Requirements’ Labels In Diagram
- In the Expression text area of the Requirement’s label field set, enter the following AQL expression:
aql:self.eContainer(Requirements::Module).ReqIFLongName + '-' + self.ReqIFForeignID - Diagrams should now show requirement labels like “TESTS-123” instead of just “123”.
- Click on an imported requirement in the Project Explorer and display its text description in the Properties pane.
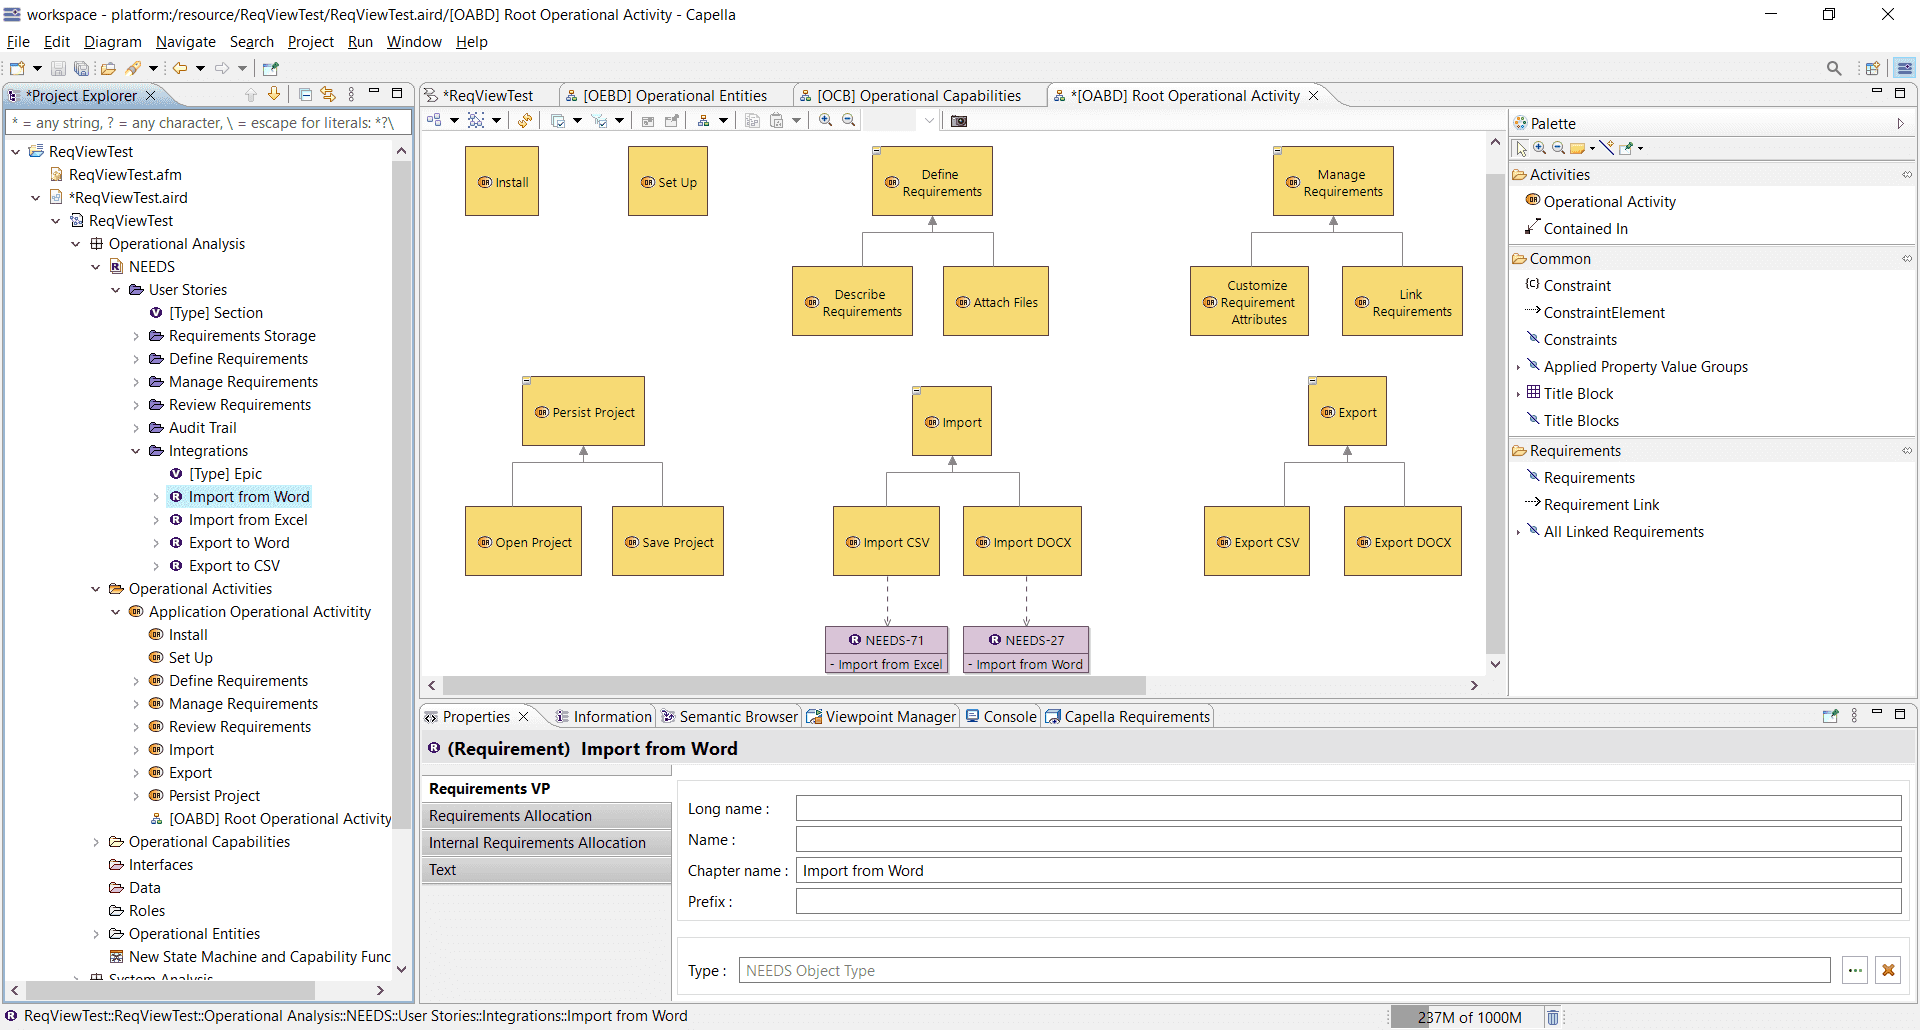
Example: Export user stories (NEEDS) from the ReqView Demo project to Capella. In Capella Operational Analysis element in the Project Explorer pane, create an Operational Activities Breakdown diagram and link operational activities to related user stories.
ReqIF SRC Round-trip
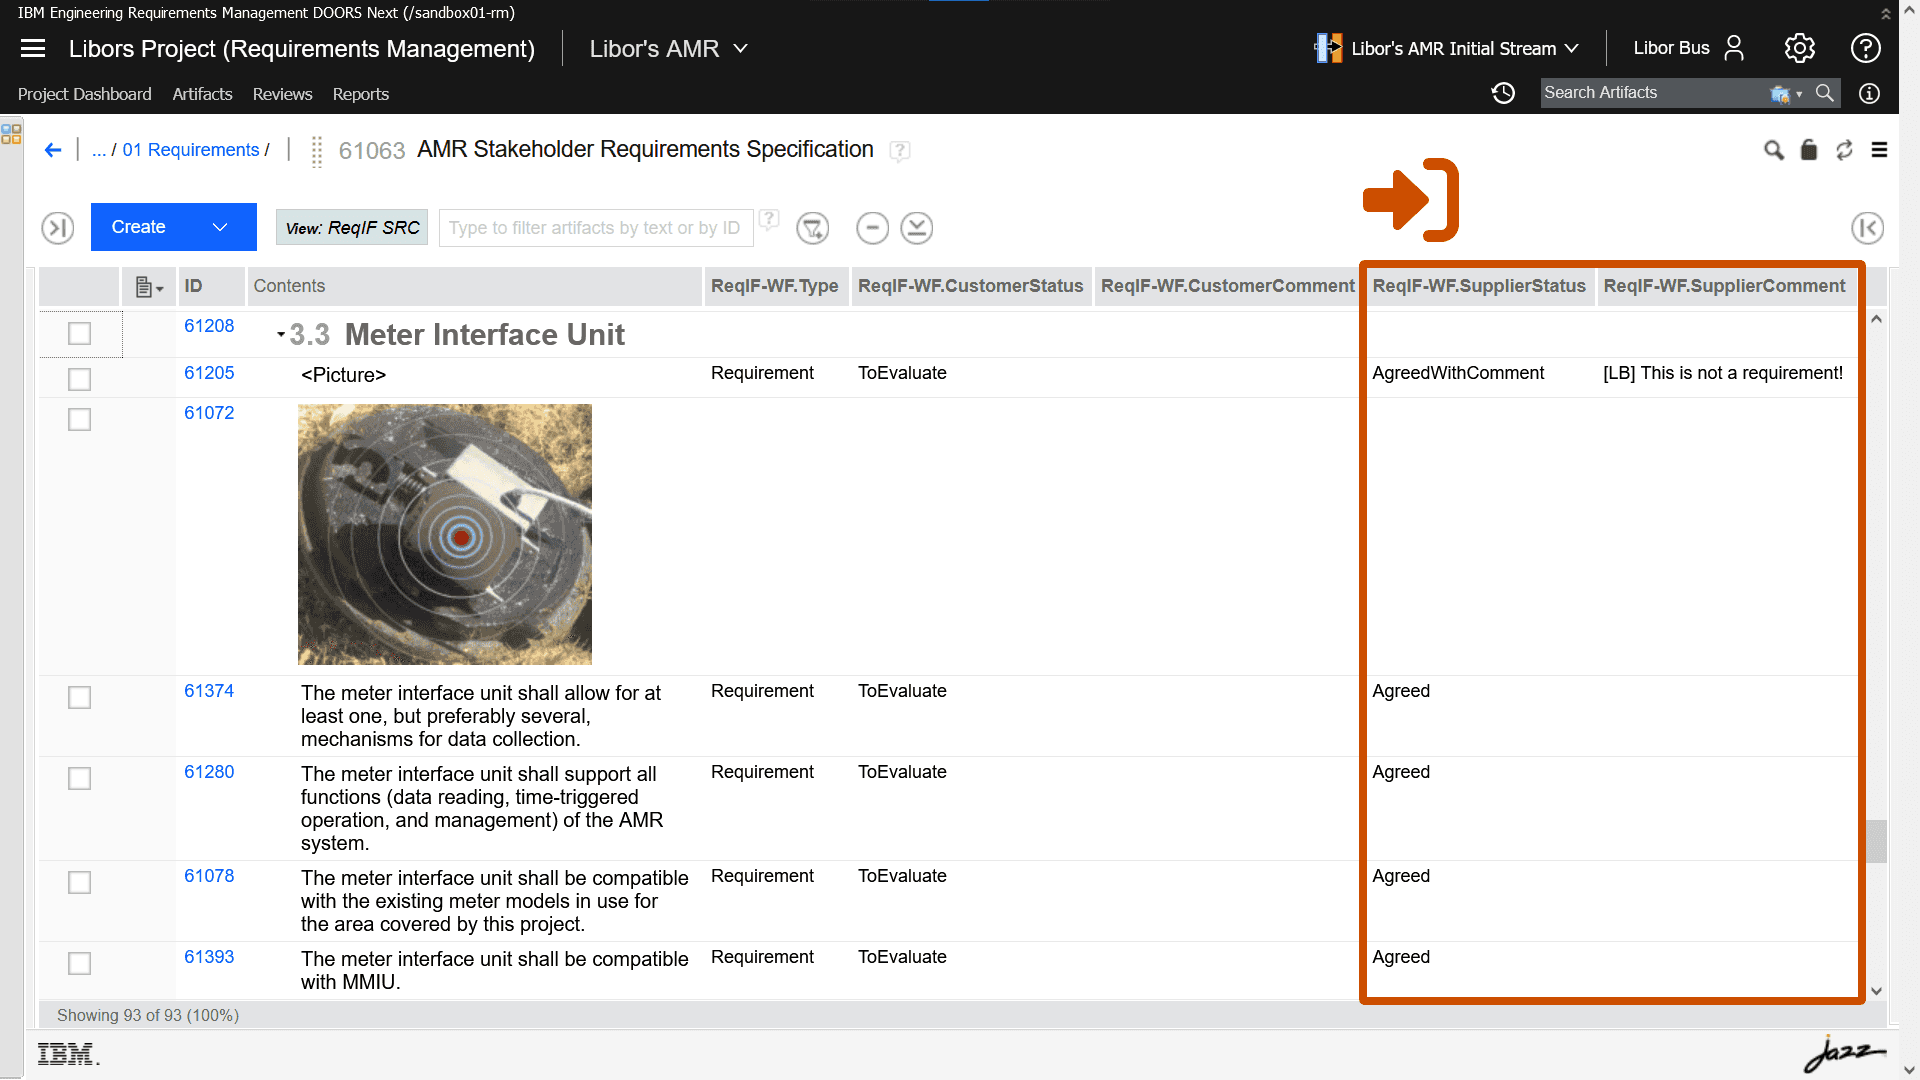
You can collaborate with your customers on Stakeholder Request Clarification (SRC) by exchanging ReqIF files, see Workflow for ReqIF Round-trip Between IBM DOORS and ReqView.
IBM DOORS is a legacy requirements management tool, which has been used widely for the development of complex HW/SW products in the aerospace & defense, automotive, and railway industries. IBM DOORS Next Generation (DNG) is its successor based on modern IBM Engineering Lifecycle Management (ELM) platform.
How to import a ReqIF file from ReqView to IBM DOORS Next Generation (DNG) RM tool.
- Open a target component in DNG.
- Click Artifacts, expand Create dropdown and select Import Artifact to open the Import wizard dialog.
- In the first step Import, select Import requirements from a ReqIF file option and click Next.
- In the second step Select Package File, click Browse and select a .reqifz file exported from ReqView, click Upload, and finally click Next.
- In the third step Specify Import Options, optionally select Import Tagging Options and click Next.
- In the fourth step Specify Attributes Options, optionally select imported attributes and click Finish.
- In the last step Importing Requirements, click Close.
- Click Modules tab and click on an imported module to see its content.
The original RM tool used by your customer can match updated requirements during ReqIF round-trip because ReqView stores ReqIF metadata (such as ReqIF IDs) in project files when you import a ReqIF package and reuses the saved ReqIF metadata when exporting a document back to the customer. For more information how to import ReqIF files to ReqView see Import Requirements From ReqIF.
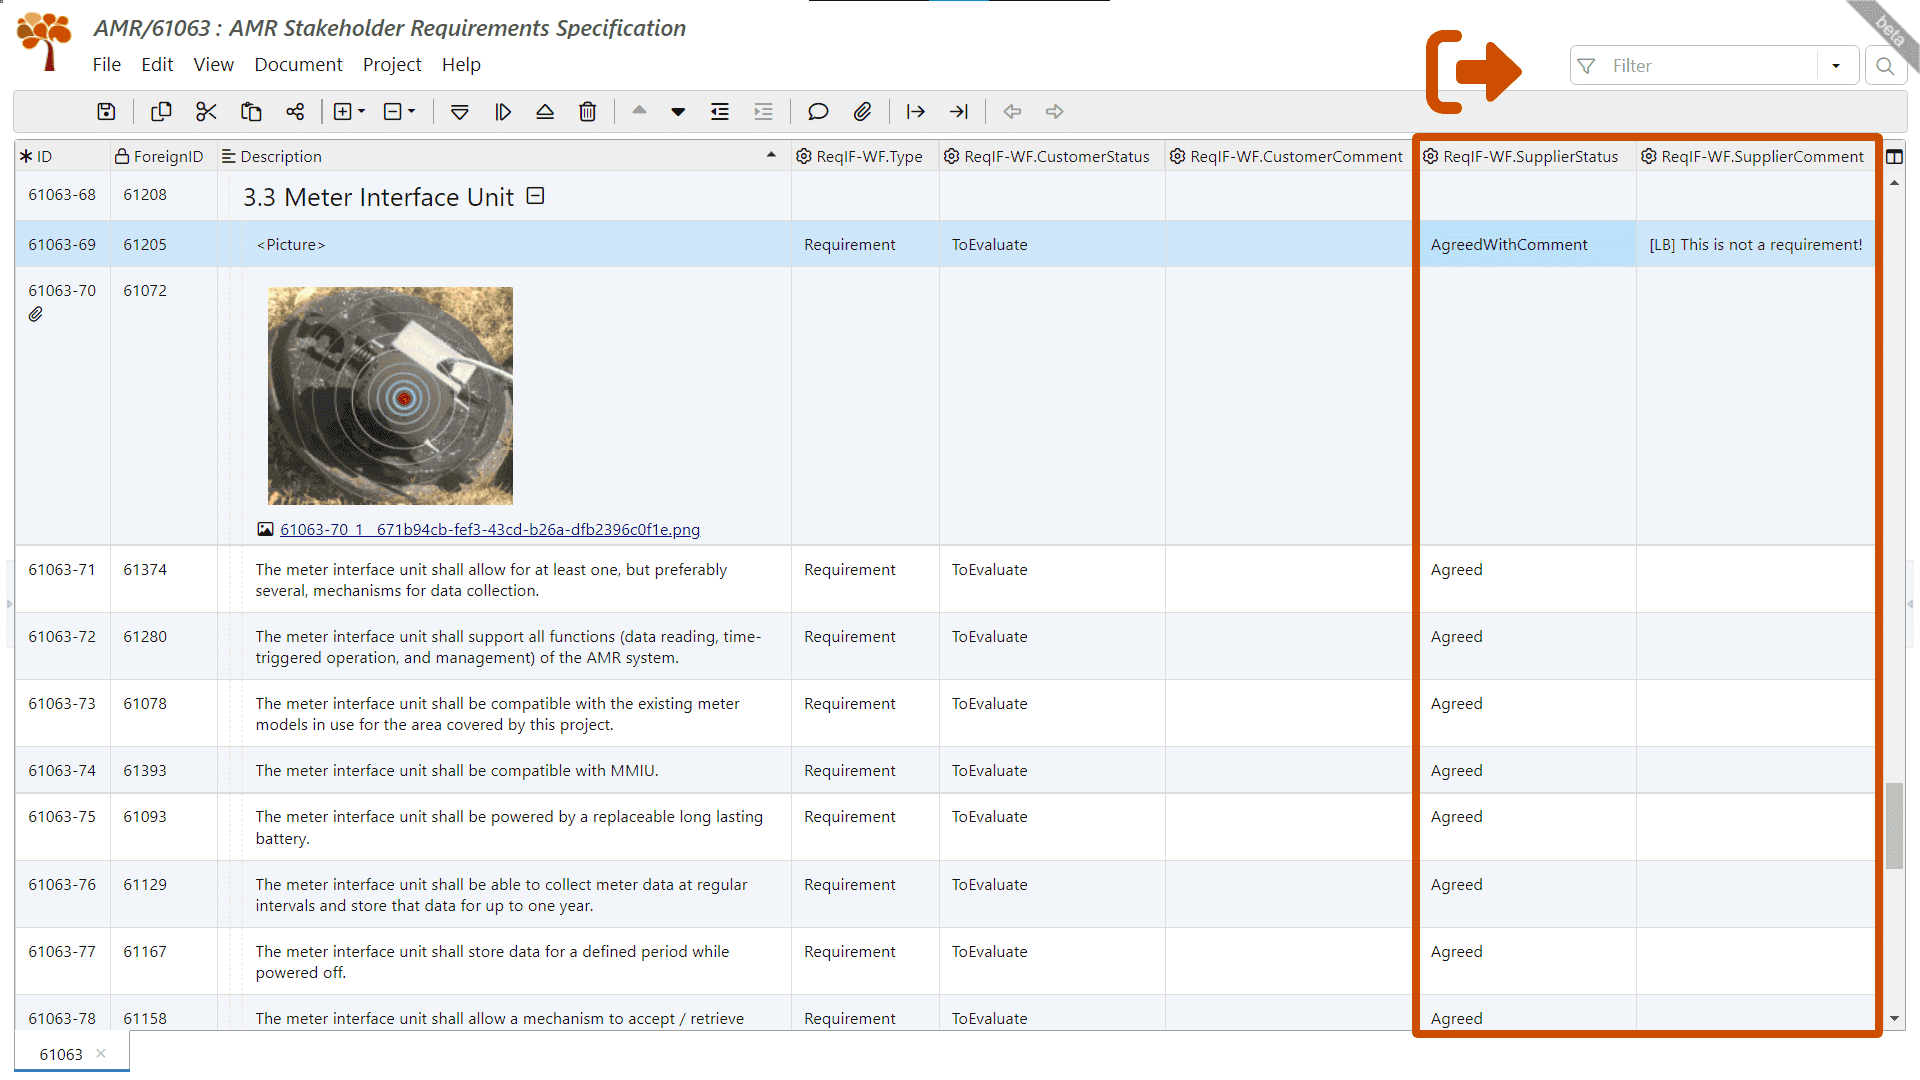
Example: Export updated AMR Stakeholder Requirements Specification from ReqView to DNG to get supplier feedback via ReqIF round-trip.
Export ReqIF from ReqView:
Import ReqIF to DNG:
Delete ReqIF Metadata
You can delete all persisted ReqIF metadata if needed, see Delete ReqIF Metadata for detailed information.
