After you create a new project or open a Project File, you can modify any of the project documents by changing the document structure, updating attributes of objects, commenting on objects, or linking objects.
When you open a Project Folder, all project documents are opened in read-only mode. To edit a document, click Document and select Start Editing Document, or press CtrlShiftE. When you finish changing the document click Document and select Finish Editing Document, or press CtrlShiftE. This feature allows multiple editors to work independently on different documents simultaneously, see Edit Documents Exclusively.
Tip: You can edit documents of a project in multiple project windows.
Note: If you are using the FREE plan, then you cannot edit projects with more than 150 objects or more documents, see Compare Plans.
Create New Objects
You can add a new document object before, after, or as a child of the selected document object. To create new objects, click Edit, mouseover Add Object, then select one of the following options:

Alternatively, right-click the selected document object and choose the option from the context menu. Or, just use shortcuts as shown above. Press CtrlEnter to insert a new object after, or press CtrlShiftEnter to insert a new object before, or press CtrlAltEnter to insert a new object as a child of the currently selected object.
The new document object gets automatically a unique ID in the current document. You can edit its heading or text description in a rich text editor.
Note: You cannot create new objects in a deleted section, if document is sorted by other column than Description, or if a filter is active, see Filter, Sort and Search Requirements.
Delete Objects
To delete the selected object (including the whole subtree containing all its children), click Edit and select Delete Objects, or press CtrlDelete. You can also click the button in the toolbar. Note: Deleted objects are not removed from the document, but are rather marked as deleted. All edit operations are disabled for deleted objects.
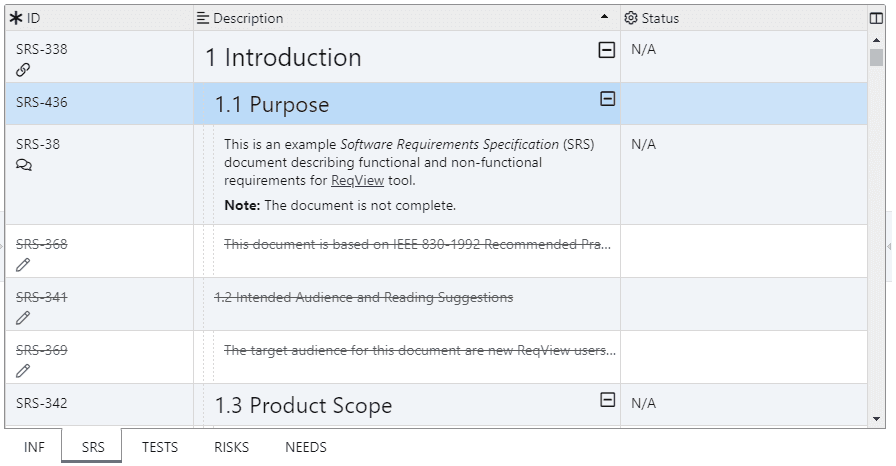
You can choose whether to display the deleted objects with full details or to display only the first line of text. Click Edit and select Preferences. In the Preferences dialog select Show details of deleted objects. The following image shows deleted objects without details:
Undelete Objects
To undelete a selected deleted object from the project (including the whole subtree containing all its children and all deleted parents on the path to the document root), click Edit and select Delete Objects, or press CtrlDelete. You can also click the button in the toolbar.
Permanently Remove Objects
To permanently remove (purge) selected deleted objects (including their deleted subtrees) press Edit, mouseover Purge Objects, and select Purge Selected, or press CtrlShiftDel. Note: Purging a deleted object also removes all deleted children, but does not work on non-deleted objects.
To purge all deleted objects in the current document, select Purge All from the Purge drop-down.
Copy Objects
You can copy objects into the application clipboard and paste them into the same or another document. Each pasted object is assigned a new ID and is placed into the tree structure of the target document. Before pasting in the new location, ensure that the destination document has configured all attributes you want to copy.
To copy the selected objects into the application clipboard, click Edit or right-click on the selected document object and then select Copy. You can also click the button in the toolbar or press CtrlC.
To paste copied objects from the application clipboard, click Edit or right-click on the selected document object and select Paste. You can also click the button in the toolbar or press CtrlV. In the Paste popup menu, select whether you want to copy the values of custom attributes, attachments, or copy object links. And specify the location of the pasted objects here:
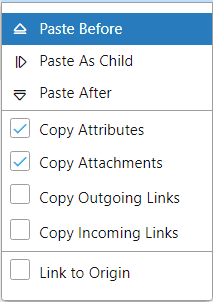
Select the Link to Origin option to link each new copy to its origin. To display the links between a copy and its origin and all links inherited from the origin, click Edit and select Preferences. From the dialog, choose Show origin and inherited links. For more information, see Copy or Inherit Links.
You have several options how to copy the whole content of a document, see Copy Documents.
Move Objects
You can move objects or whole sections easily. Cut them into the application clipboard and paste them into the same or another document. When you paste objects into another document, they are marked as deleted in the source document. In the target document, the objects will get new IDs.
To cut the selected objects into the application clipboard, click Edit or right-click on the document object and then select Cut. You can also click the button in the toolbar, press CtrlX.
To paste cut objects, click Edit or right-click on a document object and select Paste. You can also click the button in the toolbar or press CtrlV. In the the Paste popup menu, select Paste Before, Paste As Child or Paste After according to desired relative position of pasted objects to the selected document object.
You can also move a selected object in the document hierarchy. Click Edit, mouseover Move Objects, and select from the following options or use the corresponding shortcuts:
| Swap Up | CtrlShift↑ | Swap object with the previous sibling | |
| Swap Down | CtrlShift↓ | Swap object with the next sibling | |
| Promote | CtrlShift← | Promote object one level higher | |
| Demote | CtrlShift→ | Demote object one level lower |
Merge Objects
You can merge descriptions and links of sibling requirements. For instance, after import from Word if a requirement is described in more Word paragraphs, see Import from MS Word.
To merge selected document objects, click Edit or right-click on the selected document object and then select Merge Objects. Merging objects is enabled when at least 2 consecutive objects are selected and none of them has a child or is deleted.
The selected objects are merged into the first selected object as follows:
- Contents of the text description (but not heading) are joined into the first object. All other attributes are ignored – you must copy/assign the values into the first object manually before merging if this is required.
- All attachments are copied to the first object.
- All incoming and outgoing links are copied to the first object (suspect flag is ignored).
- The objects that are being merged are marked as deleted.
Edit Document Objects
You can set for each document object its section heading or text description, which are displayed in the Description column of the requirements table. You can also set values of custom attributes, which are displayed in separate columns.
Edit Section Heading
To edit the heading of the selected document object, click Edit and select Edit Heading. Or, just press CtrlH.
Edit Text Description
To edit the text description for the selected document object, right-click on the value in the Description column and then select Edit. Or, just select the value and press Enter or F2 shortcut, or double click on the value.
When the Description inline editor is open, the application automatically choose the heading or text edit mode according to the current document object. To switch to the heading edit mode, press CtrlH. To switch to the text edit mode, press CtrlT.
-
Heading Edit Mode:
![Edit section heading Edit section heading]()
-
Text Edit Mode:
![Edit requirement text description Edit requirement text description]()
You can use only basic rich text formatting from the toolbar:
- bold and italic font styles, and
- ordered and unordered (bullet) lists.
To edit the text in a dialog with more rich text formatting enabled, click the button in the toolbar. See the next section Edit Text in Dialog.
To save the changes done in the Description editor, click anywhere outside the editor or press CtrlEnter. To discard all your changes and leave the editor, press Esc.
Edit Text in Dialog
To edit the text description or rich text attributes (with xhtml type) in a dialog, click Edit and select Edit Text or press CtrlE.
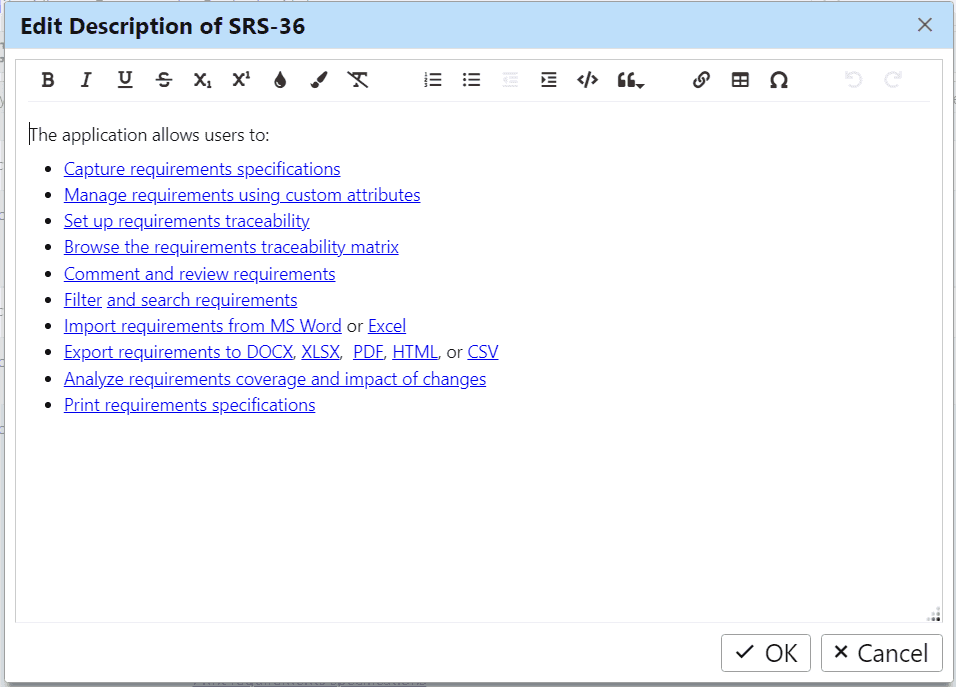
To resize the dialog, drag the resize handle in the bottom right corner.
Format Text
In the inline rich text editor, you can use advanced rich text formatting from the toolbar:
- bold, italic, underline, strike-through, subscript (lower index), superscript (upper index) font styles,
- text and background colors,
- ordered and unordered (bullet) lists,
- code and indented quote paragraph styles,
- URL links,
- embedded tables, and
- special characters.
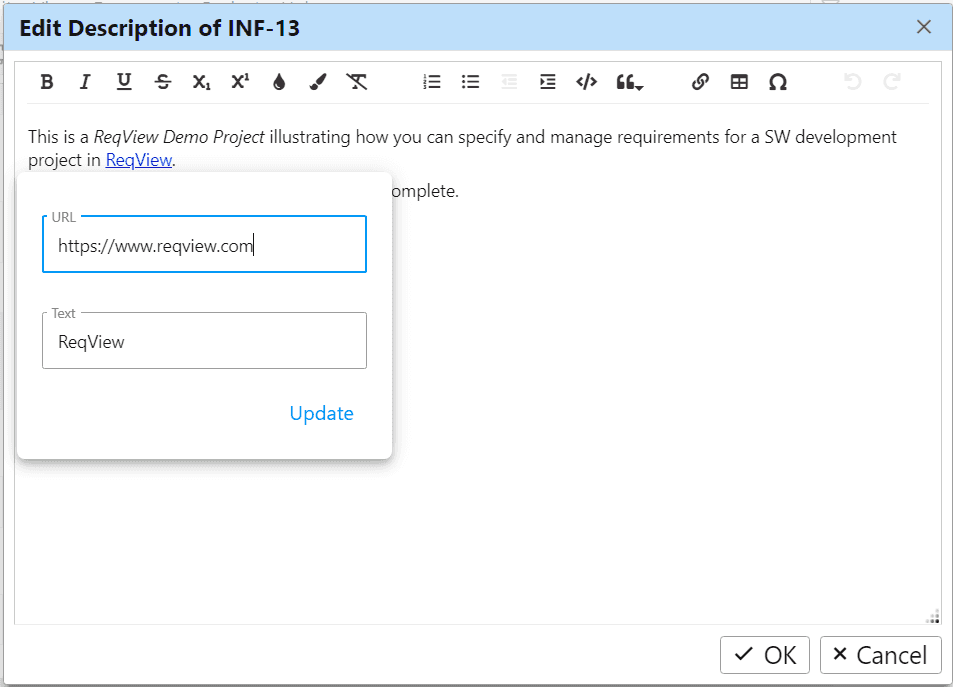
Edit URL Links
To edit an URL link, place the cursor to the linked text and choose to edit the link or unlink the text from the context toolbar.
Edit Embedded Tables
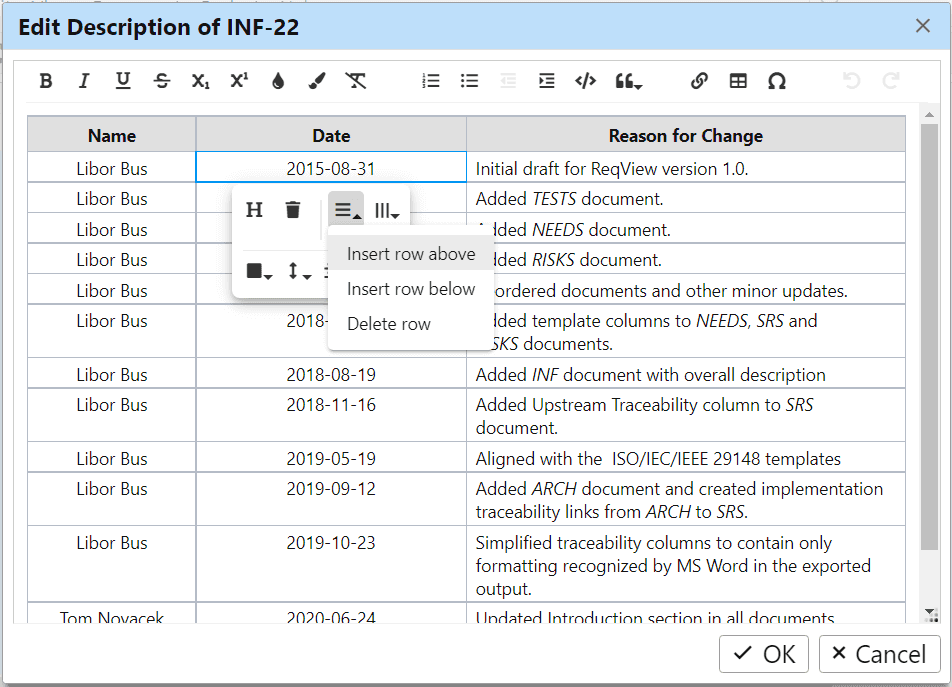
To edit an embedded table, place the cursor to table and choose an action from the context toolbar.
Choose Spelling Languages
To choose spelling languages, right-click in the rich text editor, select Spelling languages context menu item and choose one or more languages for the spellchecker. Spellchecking is currently available in the following languages: Afrikaans, Bulgarian, Czech, Danish, German, Australian English, Canadian English, British English, American English, Spanish, Estonian, French, Hebrew, Hindi, Croatian, Hungarian, Indonesian, Italian, Korean, Lithuanian, Latvian, Norwegian Bokmål, Dutch, Polish, Portuguese, Romanian, Serbian (Latin), Slovak, Slovenian, Serbian, Swedish, Turkish, Ukrainian, Vietnamese.
Edit Custom Attributes
You can select one or more document objects displayed in the table view and edit values of their custom attribute at once. To edit the attribute for all selected document objects at once:
- Press and hold Ctrl and click on the selected attribute column.
- Right-click on the selected attribute value and select Edit. Alternatively, press Enter or F2. Or, press and hold Ctrl and double click on the attribute column.
- Change the attribute value in the inline editor depending on the attribute type.
Example: Edit the value of attribute priority for two selected document objects at once.
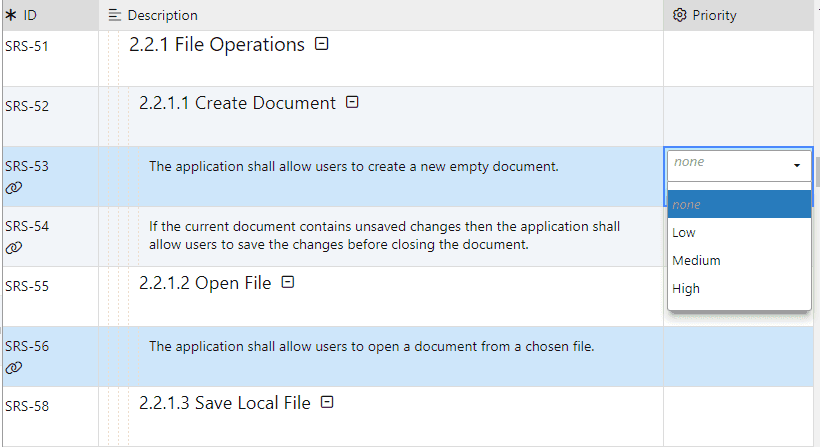
Note: Read-only attributes (with readOnly flag set) are shown with the icon in the column heading and cannot be edited.
To edit an xhtml attribute containing a larger text in the Edit dialog, select the value and press CtrlE, see Edit Text in Dialog.
You can also edit attribute values for the current document object in the Attributes pane when the edited attributes are not visible in the table view. To open the Attributes pane, click View, mouseover Right Panes, and select Attributes Pane. Or press CtrlAltA. To edit the attribute value, mouseover the attribute name in the Attributes pane and click the icon.
Example: Edit the value of attribute priority in the Attributes pane.
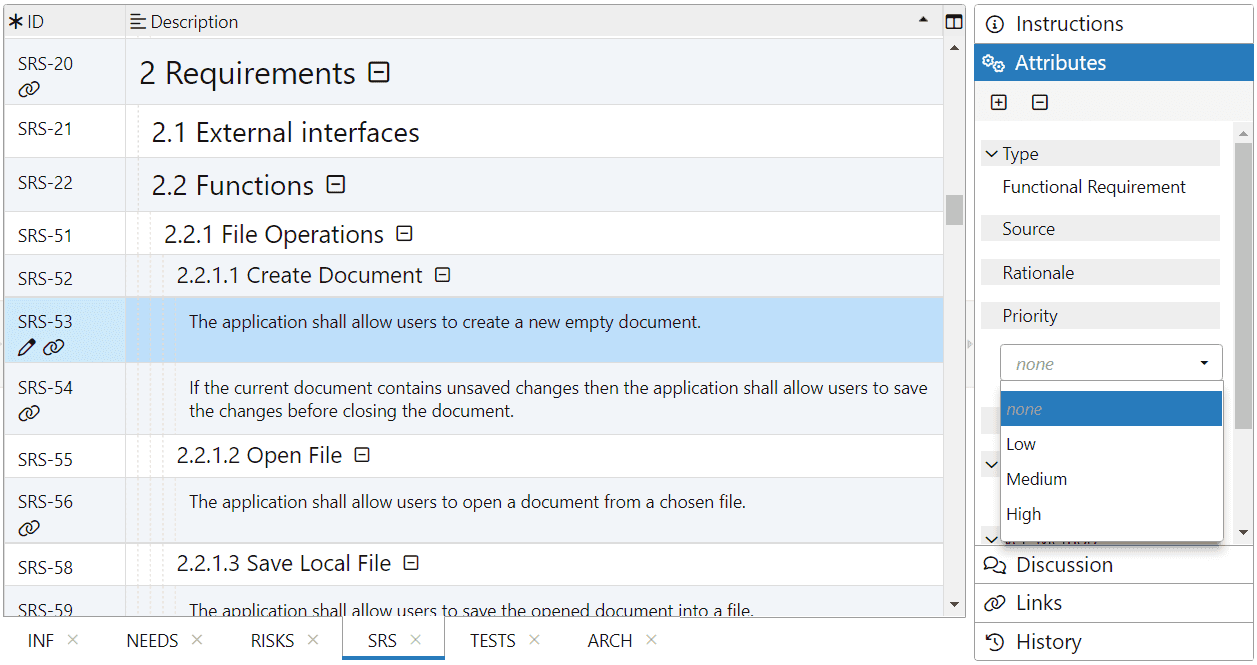
For more information how to customize document attributes see Custom Requirement Attributes.
Attach Files
You can enhance requirements description by attaching images (PNG, JPEG, GIF, BMP, SVG, WebP and AVIF), MathML files (*.mml) or document files (*.pdf, *.docx, *.xlsx, …). The application assigns each attachment a unique ID, stores it with the project data, and displays it in the Description Column:
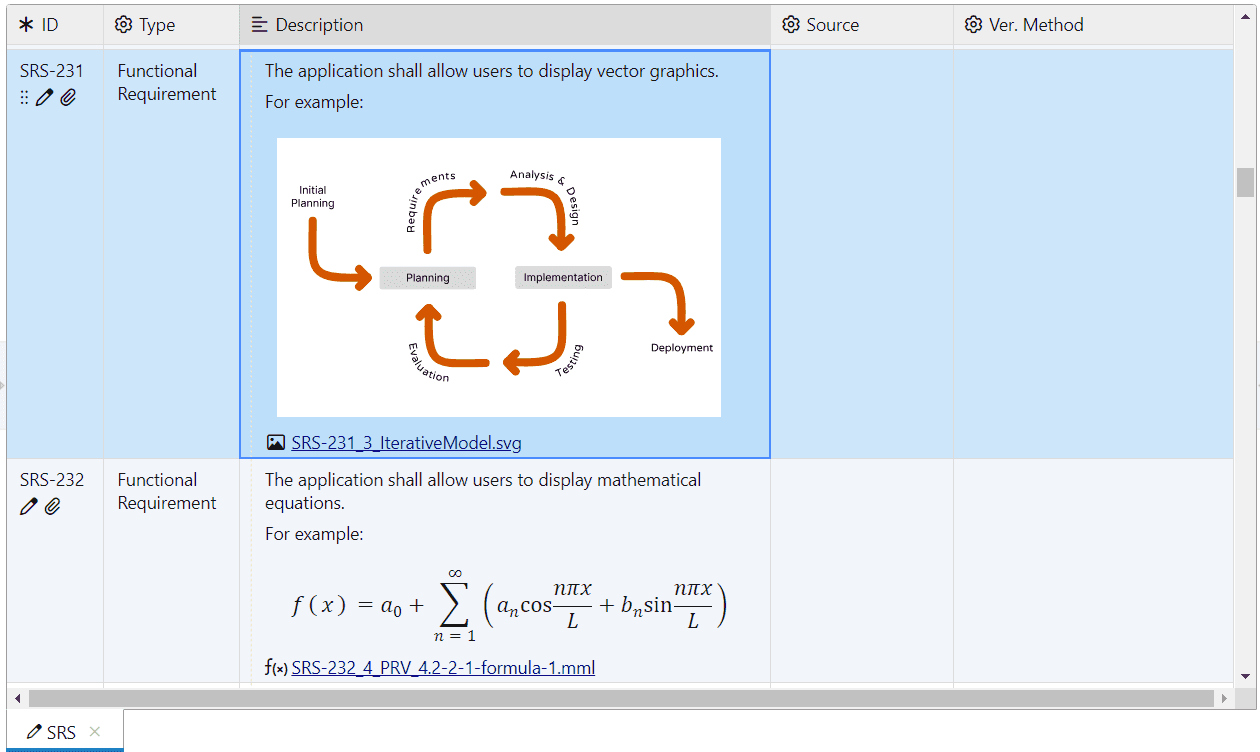
To attach a file to the selected requirement, click Edit or right-click on the document object and then select New Attachment. You can also click the button in the toolbar, or press CtrlShiftA shortcut. Finally, select the attached file.
You can also conveniently attach files by dragging them from a file explorer, or copy them from external applications via the system clipboard. In an external application, just select one or more files, press CtrlC, then select a requirement in ReqView, and press CtrlV.
Note: Drag & drop of folders with attachments is not supported. Drag & drop of selected attachment files does not work reliably for some file explorer applications on Linux.
You can also right-click on an attachment displayed in the Description column and select the appropriate action from the menu:
- Edit in External Application — edit the attachment file in the default application set by the operating system.
- Replace — replace the attachment by a selected file.
- Delete — remove the attachment.
You can edit MathML attachments in an external equation editor, such as MS Equation Editor or LibreOffice Math.
-
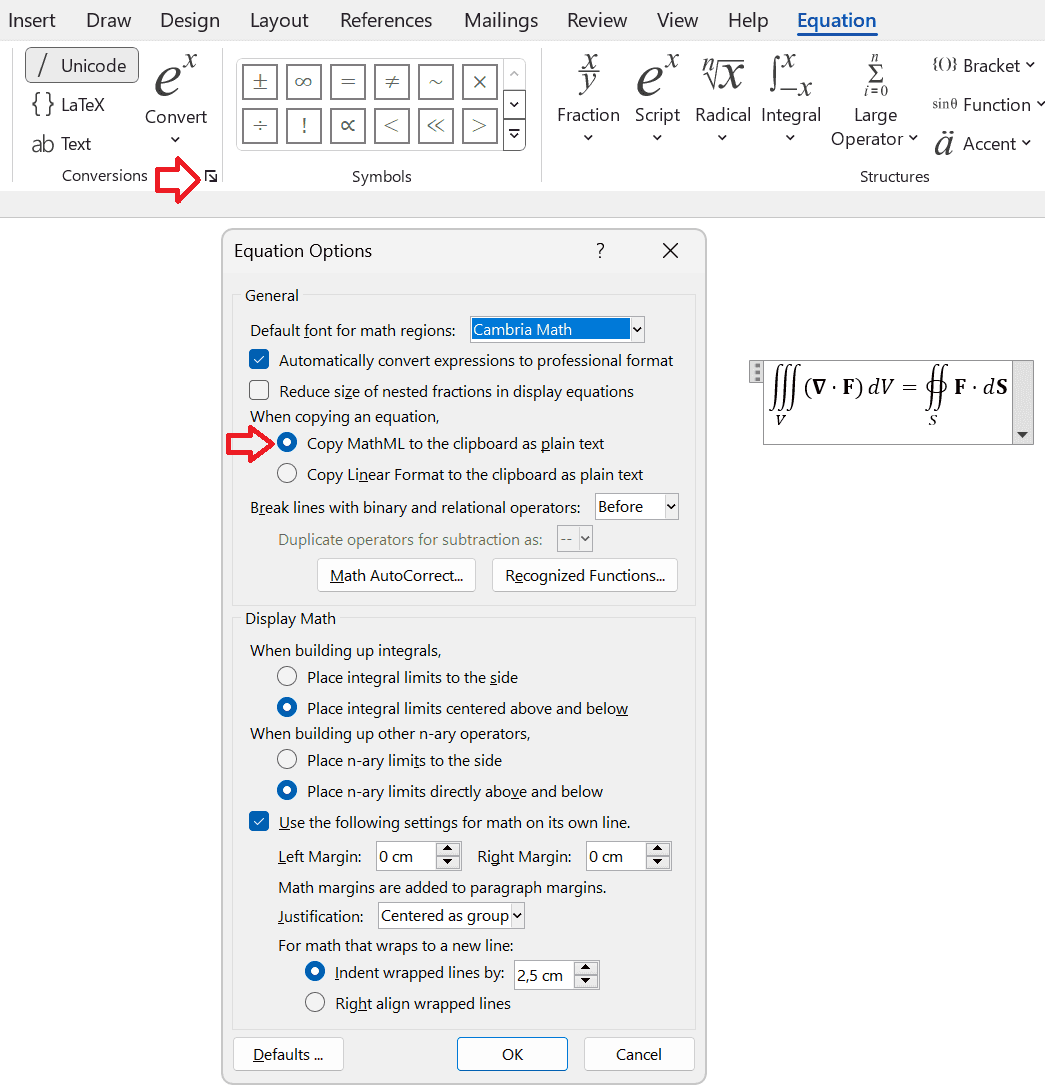
In the MS Equation Editor installed with the MS Word desktop application, choose Copy MathML to the clipboard as plain text in the Equation Options dialog as shown below:
![Configure Microsoft Equation Editor for copying Configure Microsoft Equation Editor for copying]()
Then, select an equation object in the MS Equation Editor by clicking on the grip dots icon in its top left corner, press CtrlC to copy MathML to the clipboard, select a document object in ReqView, and press CtrlV to paste the MathML attachment in ReqView.
Note: The Equation Tools in the online version of MS Word do not work with MathML and are not supported.
-
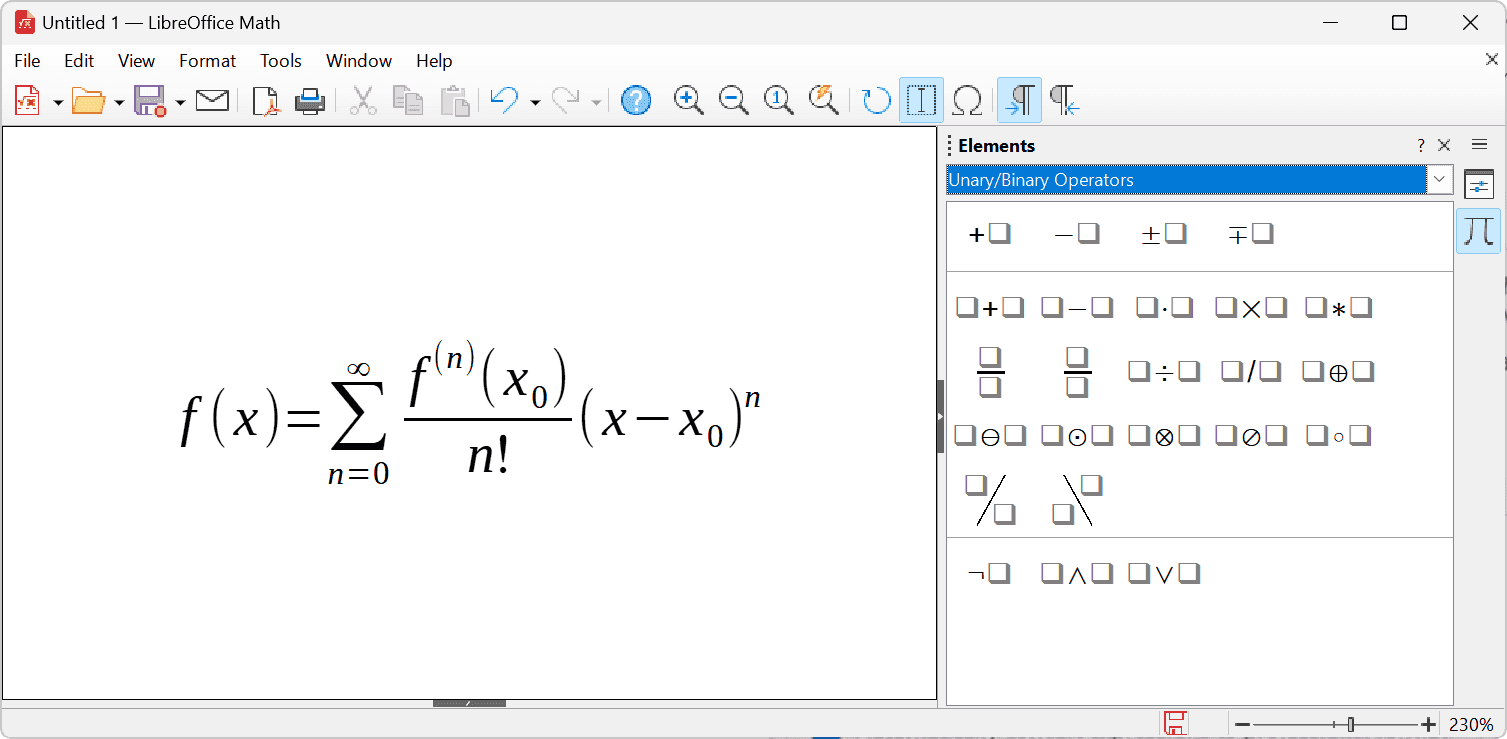
In the LibreOffice Math, click File, select Save As, and choose Save as type: MathML 2.0 (*.mml) in the Save As dialog to save an equation to a MathML file. If the Confirm File Format dialog appears, choose Use MathML 2.0 Format again.
![Using LibreOffice Math for equation authoring Using LibreOffice Math for equation authoring]()
Then attach the file to a document object in ReqView as described above in this section.
Set Document Properties
To view properties of the current document, click Document and select Document Properties, or click on the document ID on the left of document name at the top of the application window.
In the Document Properties dialog you can set the following document properties:
- Document name — enter a short document name. You can also change the document name by clicking on the document name at the top of the application window.
- Use RTL as default text direction — enable this option to change the writing direction to right-to-left (RTL) when entering new texts in a rich text editor. The default text direction for the document is left-to-right (LTR) if this option is not enabled.
To display document names in the Project and Linked Projects panes, click Edit, select Preferences, and tick Show document name in Project pane.


