You can customize requirement attributes to suit your workflow. For example, you can define attributes to capture requirements type, acceptance criteria, manage requirements status, priority, track allocation to system components, etc.
Definition of custom attributes is shared by all objects in the same document. If you need to have different custom attributes for different object types (for example, requirements and tests), separate the requirements and tests into various documents.
Attribute Types
ReqView defines the following types of document object attributes:
int— integer numberbool— boolean valuestring— string valuedate— date stored as ISO 8601 stringreal— floating point numberenum— single enumeration value or multiple enumerations valuesxhtml— rich text in XHTML format
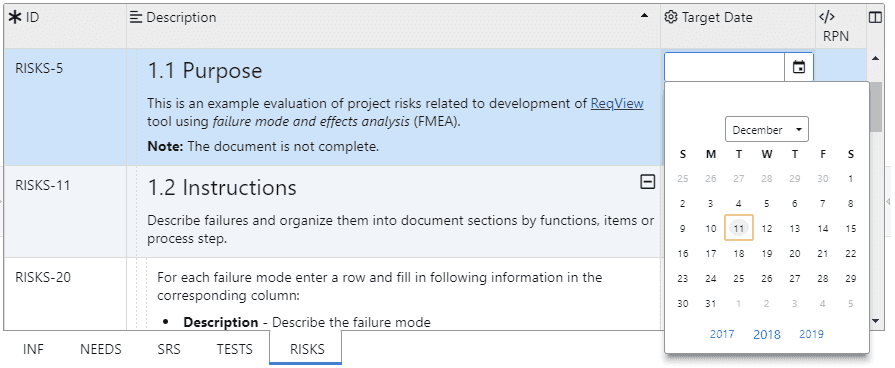
The type of an attribute determines how the attribute value is formatted in the requirements table and which editor is used. For example, the following image shows editor for date type:

For more information about how to display and edit custom attributes, see Edit Attributes.
System Attributes
ReqView defines the following internal system attributes of document objects:
- id — unique object identifier (
string) - heading — section heading (
string) - text — text description (
xhtml) - discussion — array of comments
- history — array of changes
- level — the internal object level in the document tree structure (
int) - deleted — flag set to true if the object is marked as deleted (
bool) - parent — ID of the parent section (
string) - origin — ID of the origin object if the current object is a copy (
string)
Custom Attributes
Primitive Attributes
Custom primitive attributes are defined using the following JSON format:
{ <attributeId>: { "type": <string>, "name": <string>, "readOnly": <bool>, "external": <bool>, "help": <bool>, "hint": <string> }, ...}where:
- attributeId — is the unique ID of the custom attribute, for example "externalId". We strongly recommend using IDs without white spaces to simplify their handling in export templates.
type— is one of the following attribute types:int,bool,string,date, orreal.name— is the optional long attribute name displayed in the corresponding column header, for example "External ID".readOnly— is an optional flag set totrueif the user should be prevented from changing the attribute value (each attribute is editable by default).external— is an optional flag set totrueif the attribute is managed by an external tool (e.g., Jira) and should not be persisted in the project data.help— is an optional flag set totrueto display the attribute value in the Instructions pane instead of the table view. This flag is valid forxhtmlattributes only. If morexhtmlattributes havehelpflag set totruethen all of them will be displayed in Instructions pane. See Instructions for an example.hint— is an optional property set to a string explaining how to set the attribute value. This string is displayed as a tooltip on column header. Forxhtmlandstringattributes it is also displayed as a placeholder in the editor.
Enumeration Attributes
Enumeration attributes enables selection of one or more predefined values from a drop down list. For example, you can define enumeration attribute priority with values "High", "Medium", or "Low".
Custom enumeration attributes are defined using the following JSON format:
{ <attributeId>: { "type": "enum", "name": <string>, "hint": <string>, "readOnly": <bool>, "values" : [ { "key": <string>, "label": <string>, "default": <bool> }, ... ], "multiValued": <bool> }, ...}with the following additional properties compared to the primitive attributes:
values— is an array of allowed enumeration values. Each value has a unique stringkey. Optionally, it can have a textlabel, and a flagdefaultdenoting if the value should be used as default if the attribute is not set.multiValued— is an optional flag set totrueif the enumerated attribute can have multiple enumeration values (e.g: used for list of system components affected by each requirement, user roles,...) and set tofalseif only one enumeration value is possible (e.g., requirement status or priority).
Note: The key property should contain only letters, numbers and underscore otherwise there might be unexpected issues when filtering or exporting documents.
Customize Attributes
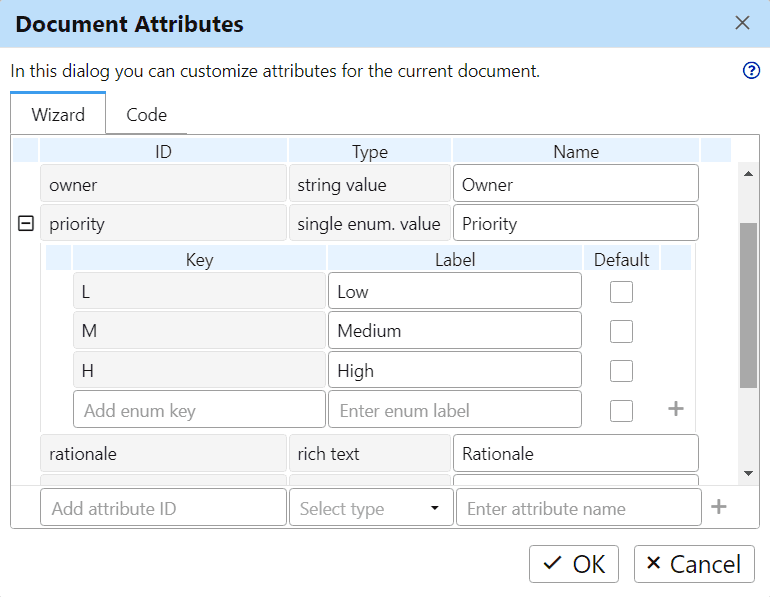
To create and update the custom attributes definition the Document Attributes dialog, click Document and select Customize Attributes.
In the Wizard tab, you can edit document attributes intuitively, however with some limitation:

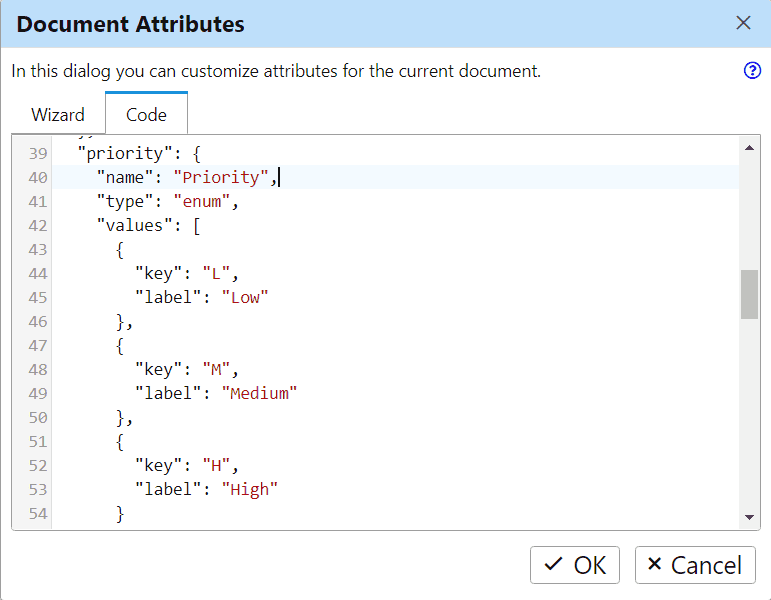
In the Code tab, you can get full control over custom attributes definition:

The code editor instantly verifies the attributes definition and displays a warning when it is not valid. After changing the custom attributes definition, click OK to confirm the changes. The document columns are restructured according the new definition.
Tip: In order to not lose data, we recommend you create a backup copy of the project before renaming or removing custom attributes as it will drop attributes values from the current requirements document. Similarly, changing the attributes type will result in conversion of the attribute values stored in the document.
Edit Attribute Values
You can edit custom attribute values in the corresponding column of the table view or in the Attributes pane. For more information see Edit Documents > Edit Custom Attributes.
Examples
Requirement Status
The following sample shows how to define requirement status as a single value enumeration attribute:
{ "status": { "name": "Status", "type": "enum", "values": [ {"key": "Draft"}, {"key": "Ready"}, {"key": "Reviewed"}, {"key": "Approved"}, {"key": "Released"} ] }}Requirement Priority
The following sample shows how to define requirement priority as a single value enumeration attribute:
{ "priority": { "name": "Priority", "type": "enum", "values": [ { "key": "-", "label": "Unassigned", "default": true }, { "key": "1", "label": "Low" }, { "key": "2", "label": "Medium" }, { "key": "3", "label": "High" } ] }}Allocation to Components
The following sample shows how to define requirement allocation to sub-systems, components, or projects as a multi-value enumeration attribute:
{ "components": { "name": "Components", "type": "enum", "values": [ { "key": "Desktop", "label": "ReqView Desktop" }, { "key": "Mobile", "label": "ReqView Mobile" }, { "key": "Synchronizer", "label": "ReqView Synchronizer" }, { "key": "Server", "label": "ReqView Server" }, { "key": "Support", "label": "Support" } ], "multiValued": true }}Effort Estimation
The following sample shows how to define requirement effort estimation (MD or story points) as an integer attribute:
{ "effort": { "name": "Effort [MD]", "type": "int" }}Responsible Person
You can define requirement responsible person as a string attribute:
{ "responsible": { "name": "Responsible User", "type": "string" }}Deadline
The following sample shows how to define requirement deadline as a date attribute:
{ "deadline": { "name": "Deadline", "type": "date" }}Acceptance Criteria
The following sample shows how to define requirement acceptance criteria with a rich text description of the acceptance test:
{ "acceptance": { "name": "Acceptance Criteria", "type": "xhtml" }}Instructions
The following sample shows how to define instructions displayed in the Instructions right pane:
{ "instructions": { "name": "Instructions", "type": "xhtml", "help": true }}If any custom attribute of type xhtml has property help set to true then the attribute value for the current document object is displayed in the Instructions pane. To edit the attribute value, mouseover the attribute name in the Instructions pane and click the icon.
Note that if the attribute value is not set for the current document object then the Instructions pane shows the attribute value set for the nearest parent section. That way, instructions set for top-level sections are shown for all their descendants, but they can be still overridden by instructions specific to a subsection or a requirement.
External Jira Status
The following sample illustrates how to define external read-only attribute for displaying the status of exported Jira work items:
{ "jiraStatus": { "name": "Jira Status", "type": "string", "readOnly": true, "external": true }}